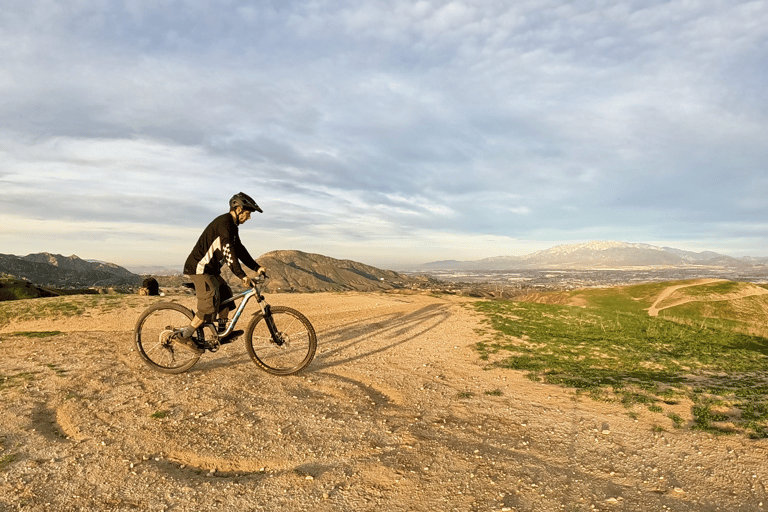
How to Lift Your Rear Wheel on a Mountain Bike (Flat Pedals Tutorial)
Learn how to lift your rear wheel on flat pedals with proper weight shift and pedal scoop. Build bunny hop skills and clear trail obstacles safely.
SKILLS
1/11/20264 min read

How to Lift Your Rear Wheel on Flat Pedals (MTB Rear Wheel Lift Tutorial)
Learning to lift your rear wheel on flat pedals is one of those MTB skills that seems small, until you realize it’s the missing piece behind so many other moves.
If you want to:
learn bunny hops the right way
get your rear wheel up and over trail obstacles
build better jump and bike-control technique
then the rear wheel lift is a skill you NEED.
In this guide I’ll break down exactly how I lift my rear wheel on flat pedals, plus the key mistakes most riders make (including mistakes I made myself).
Why Learning Rear Wheel Lift Matters
A rear wheel lift helps you in real trail situations, not just bike park tricks.
Here’s what it unlocks:
✅ bunny hops (rear wheel is the hard part)
✅ clearing rocks, roots, curbs, ruts, and trail trash
✅ better body control for manuals and jumps
✅ smoother riding — less smashing your rear rim into everything
Learn It on Flat Pedals (Trust Me)
This is a big one.
When I was a kid learning jumping, bunny hops, even wheelies, I made the mistake of learning a lot of stuff clipped in.
It worked — and it felt easier.
But later, when I switched to flat pedals and wanted solid technique without relying on clips, it was harder to relearn the movement properly.
So if you’re a beginner (or you’re still early in your progression), I highly recommend:
✅ learn rear wheel lift on flat pedals from day one
You’ll develop real foot control, better timing, and stronger technique that carries over into everything.
Video Tutorial: Rear Wheel Lift on Flat Pedals
Step 1: Lower Your Seat (So It’s Not in the Way)
First thing: lower your seat.
When you’re learning rear wheel lift, you want freedom to shift your weight back and forward without the seat hitting you or blocking your movement.
This isn’t a seated skill, it’s about timing, body position, and weight shift.
Step 2: Start Slow (Walking Pace Works Best)
A lot of riders try to learn this going too fast and get frustrated.
The truth is:
✅ You can learn rear wheel lift at a slow rolling speed, around a walking pace
Going slow makes it easier to:
feel the weight shift
control the bike
avoid panic movements
Once the technique clicks, you can do it faster and higher.
Step 3: Get in a Neutral “Centered” Stance
Before you lift anything, you need the right starting position.
Stand up in a relaxed athletic stance:
pedals level
knees bent slightly
elbows bent
chest over the center of the bike
Think: your body is balanced over the bike, ready to move.
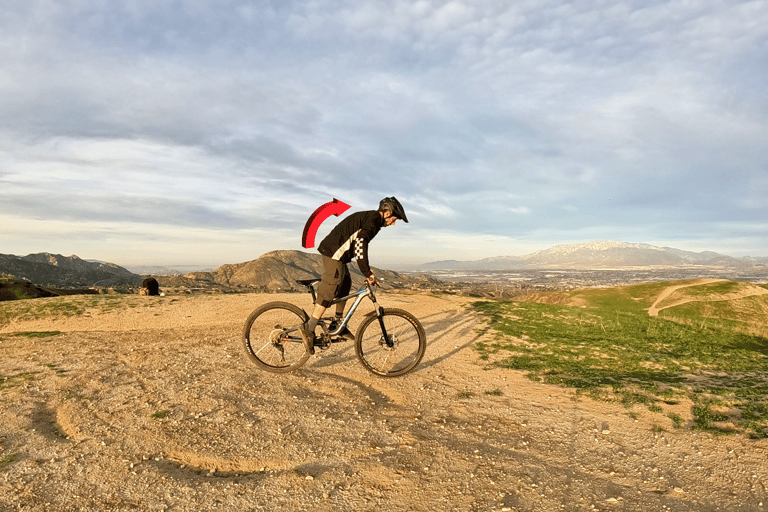
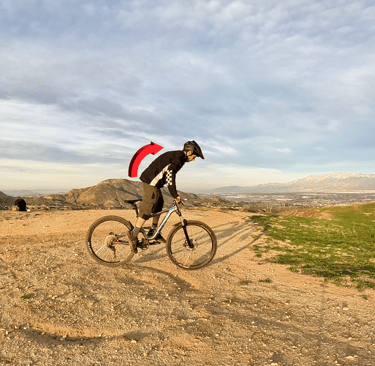
Step 4: Shift Your Weight Back Over the Rear Hub
Here’s the first key movement:
✅ quickly shift your body weight back — over the rear tire / rear hub
This “unweights” the rear wheel and loads the bike for the next part.
A good mental cue is:
shift back like you’re about to manual (but don’t pull up into a manual).
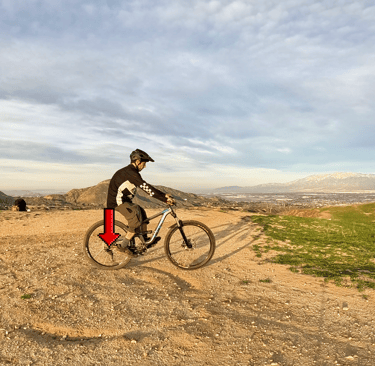
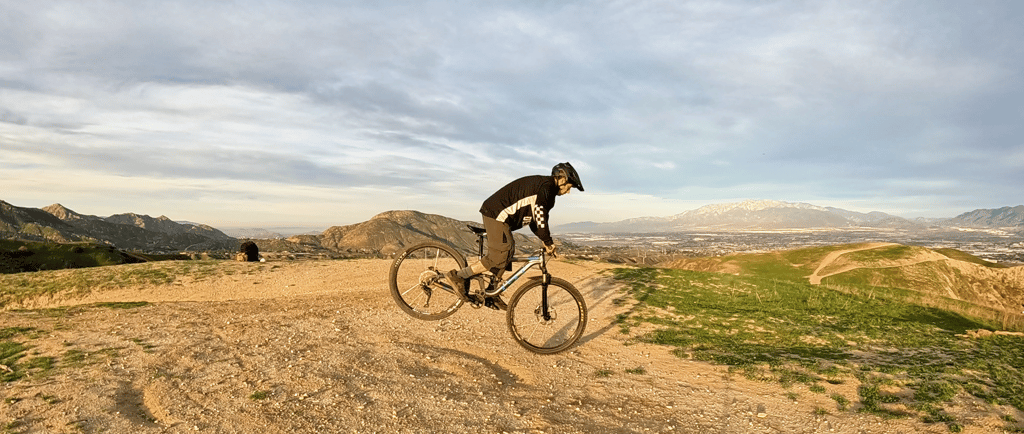
Step 5: Shift Forward + Scoop the Pedals (This Is What Lifts the Rear Wheel)
This is the part most riders miss.
The rear wheel doesn’t lift because you “jump.”
It lifts because of the combination of:
weight shift timing
and the flat pedal scoop
Here’s what to do:
✅ shift your weight forward
✅ at the same time, do a rearward scooping motion on the pedals
That scoop is what makes the rear wheel come up.
If you don’t scoop, you’ll feel like the bike just stays glued to the ground.
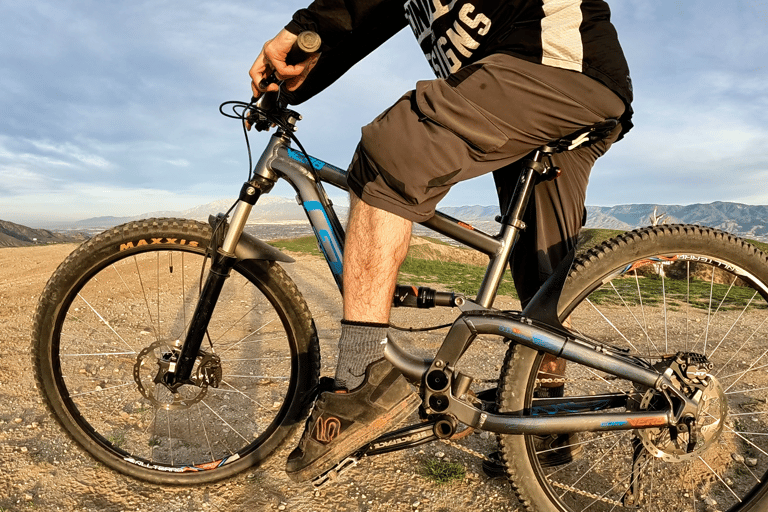
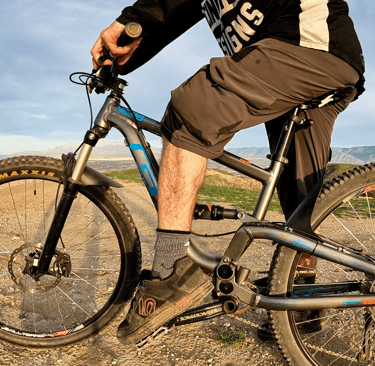
Tip: The rear/back foot is the main lifting foot. It’s normal for the front foot to not point down as much (and sometimes feel like it slightly unweights or even floats a bit), because the rear foot is the one that “hooks” the pedal and lifts the rear wheel.
Foot Position Tip: Slight Toes Down = More Grip
When I ride flat pedals, I’ve found this helps a ton:
✅ keep your toes slightly pointed down
If your feet are totally flat, it’s easier for them to slip.
And slipping a pedal while learning this skill can lead to the worst thing in MTB:
😬 pedals to the shin
Safety Tip: Wear Shin Guards While Learning
Real talk — I strongly recommend using shin pads / shin guards when learning:
rear wheel lift
bunny hops
jumps on flat pedals
It takes one bad slip to turn training into a bloody mess.
Safety is progress.
Bonus Tip: Rolling Forearms/Wrists Forward
This is a small thing, but it can help.
I’ve found that slightly rolling my forearms and wrists forward can help the timing feel smoother, especially during the shift back → shift forward movement.
Important:
This isn’t a big dramatic move.
Just a subtle technique cue to help the bike respond.
Common Mistakes to Avoid
❌ Trying to yank the rear wheel up
The rear wheel lift isn’t a pull. It’s a scoop + weight shift.
❌ Starting too fast
Learn it slow first. Speed can come later.
❌ Keeping the seat too high
Drop it. The seat can ruin your movement.
❌ Feet too flat on the pedals
Slight toes-down gives better grip and control.
Flat Pedal Gear That Helps (Optional)
You don’t need fancy gear to learn this skill, but good flat pedal setup helps a LOT.
Two things matter most:
✅ grippy flat pedals (metal pins help)
Race Face Chester Flat Pedals (great value + reliable pins)
OneUp Composite Pedals (super grippy + popular for MTB)
✅ sticky shoes (MTB flat pedal shoes grip way better than regular skate shoes)
Five Ten Freerider MTB Shoes (Amazon)
Final Thoughts
If you want better bunny hops, safer trail riding, and real flat pedal control, the rear wheel lift is one of the best skills you can learn.
Start slow, focus on timing, and don’t rush it.
Once it clicks, you’ll be lifting your rear wheel over trail obstacles automatically without thinking — and your riding level jumps up fast.
Want more MTB skill guides?