Your First Mountain Bike Park Day: What Beginners Need to Know
Going to a mountain bike park for the first time? Learn what to expect, what to bring, trail etiquette, lift tips, safety, gear, and how to prepare.
BLOGSKILLS
8/21/202611 min read


Your First Mountain Bike Park Day: What Beginners Need to Know
Your first day at a mountain bike park can be a little intimidating. You have the lifts, riders flying around everywhere, trails that may be bigger and rougher than what you're used to, and a bunch of unwritten rules that nobody really explains to you. But bike parks are also one of the best places to ride and progress. Lift access means you can get more descents in one day than you might get in a month of pedaling up your local trails.
I've spent a lot of time riding bike parks over the years, including plenty of multi-day trips, and there are definitely some things I wish every first-time rider knew before showing up. From choosing the right trails to dealing with faster riders and figuring out the lift, here's what I'd recommend knowing before your first bike park day.
Go on a Weekday If You Can
If you have the option, I recommend going on a weekday for your first bike park day. Many parks are only open on weekends early in the season and then switch to daily operations during the peak months. Once they're open during the week, those are some of my favorite days to go. Lift lines are usually shorter, trails aren't as crowded, and you don't have as many riders coming up behind you. That's especially nice when you're still learning the trails and figuring out how everything at the park works. Weekends are completely fine too, but if your schedule gives you the choice, I'd pick a weekday.
Expect Rougher and Bigger Terrain
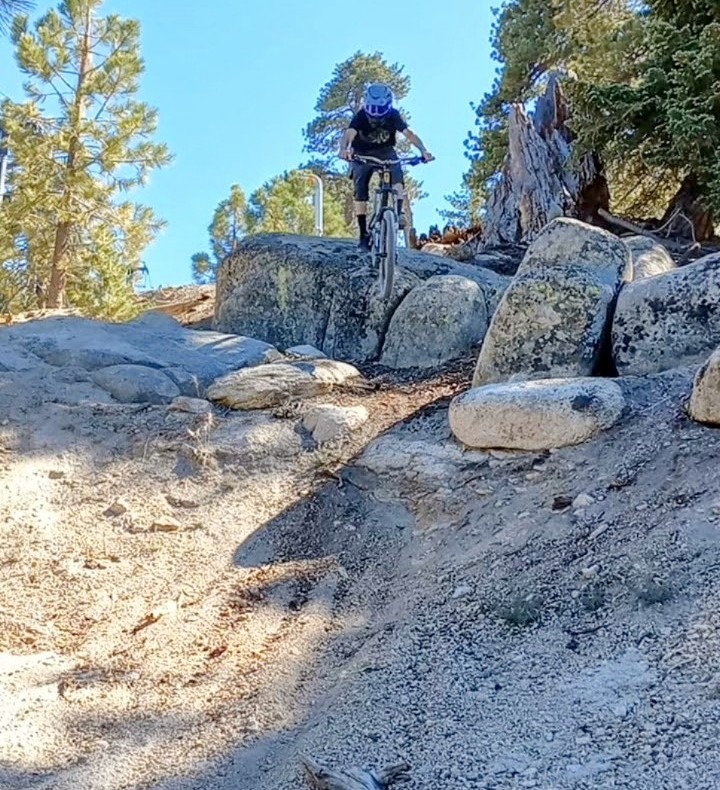
Don't assume a trail at the bike park will feel exactly like a trail with the same rating back home. Park trails get absolutely hammered. Thousands of riders can ride the same sections, brake in the same places, and hit the same corners. That creates braking bumps and generally rougher terrain. You'll also find bigger jumps, drops, rock sections, and other features than you may be used to on your local trails.
This is also one of the places where having the right bike and protective gear makes a noticeable difference. I consider bike parks full-face helmet and knee-pad territory. If you're showing up on a lightweight XC bike with minimal protection, you're probably going to feel both the terrain and the abuse your bike is taking.
If you're not sure what gear or clothing to bring, I also have a full guide on what to wear mountain biking, from helmets and shoes to gloves, pads, and riding clothes.
Be Honest About Your Skill Level
One of the easiest ways to get yourself into trouble is showing up and thinking the green trails are beneath you because you're already a decent mountain biker. There's nothing wrong with starting easy. In fact, I think it's one of the smartest things you can do on your first day at a new park. Trail ratings can vary between locations, and a black trail at a bike park may be very different from the black trails you're used to riding locally.
Start with something easy, learn what the park considers a green, blue, and black, and work your way up. Even experienced riders warm up. There's no prize for dropping into the hardest trail you can find on your first lap. The alternative can be getting hurt or realizing you're in way over your head and having to walk your bike a long way down the mountain.
Bike Park Trails Aren't Always Dirt
Something that can surprise first-time park riders is that not every surface is dirt. You may find pavers or brick-like blocks used on berms and other high-traffic sections. Dirt gets destroyed when thousands of riders brake and rail through the same corner every day, so parks sometimes use these harder surfaces to keep the trail together. Pavers can actually have really good grip, but they don't feel exactly like dirt under your tires. Give yourself a little time to get used to them rather than charging into your first paver berm at full speed.
You'll probably encounter wooden features too. Parks can have wooden bridges, rollers, berms, and wall rides. Dry wood can be predictable and grippy, while wet or frosty wood is a completely different story. Treat wet wood with the same respect you'd give wet roots. On wooden features, being smooth and predictable is usually better than panicking and grabbing a bunch of brake halfway through.
You Might See a Tombstone on a Jump
Another feature you might see at a bike park is something called a tombstone. It's basically a taller, steeper kicker built off to the side of the normal jump takeoff. Advanced riders can use it to get extra height from the same jump. If you're new to the park and see a strange tall section next to the normal lip, you don't have to ride it. Stick with the regular takeoff and let the tombstone be someone else's problem for now.
Never Stop on a Jump or Landing
This is probably one of the most important things to know: never stop on a jump, landing, or another feature where riders coming down the trail can't see you. On your local trails you might be used to stopping and looking at a jump before riding it. At a busy bike park, standing on a lip — or even worse, a landing — can be genuinely dangerous. Riders are coming in fast, and depending on the feature, they might not be able to see you until they're already in the air. People can and do get landed on.
If you want to look at a feature, get completely off the trail and use designated viewing areas or ride-around lines when available. If you're not sure where you can safely stand, ask someone working at the park.
Don't Worry So Much About Faster Riders
I want to talk directly to newer riders here because I remember worrying about this myself. When I was a kid, I would get legitimate anxiety about faster riders behind me. I'd sit at the top of a trail looking at everybody around me and thinking, Does that guy look fast? Is he going to catch me? If someone looked quick, I'd wave them ahead: "Go ahead, go ahead." Then I'd start riding and spend half the descent worrying about whether somebody else was coming up behind me.
My advice now is to relax. Getting passed is completely normal. Everyone on that mountain has been passed a thousand times. If somebody catches you, they'll normally let you know they're there and pass when there's a safe opportunity. One important thing that can feel counterintuitive when you're new is to hold your line. Don't suddenly swerve across the trail because you're trying to get out of their way. The faster rider is already watching you and figuring out where they're going to pass. If you suddenly change direction, you can move directly into the path they were planning to take. Be predictable, keep riding your ride, and let them work out the pass. At the same time, if you catch somebody slower than you, give them space. We've all been the slower rider.
Loading Your Bike on the Lift Can Feel Awkward
Nobody seems to talk much about this, but putting your bike on a lift for the first time can cause some real anxiety. Different parks use different lift systems, so there's no single method you need to memorize before going. Watch a few other riders load their bikes before it's your turn, and if you're uncomfortable doing it yourself, ask the lift staff for help. At many parks, they'll load it for you.
Nobody cares that it's your first time. It's much better to ask than rush because you feel like everybody behind you is waiting. After you've done it a few times, it becomes routine.
Know About Bike Patrol
Bike parks have bike patrol, basically the mountain bike version of ski patrol. Patrollers ride the mountain throughout the day and are trained to respond when someone gets hurt and help get injured riders off the mountain. You'll often see a phone number for patrol posted on signs around the park. I think it's worth putting that number in your phone or snapping a picture of it when you arrive. You can also ask about it at the ticket booth. It's better to have it before you need it than to be looking for a sign after somebody has already crashed.
If you come across an injured rider who needs help, call patrol or flag down a patroller. You'll also see patrol riding around living their best life. Riders love yelling "living the dream!" when they go by because, well, they are. They're getting paid to ride laps and help people. Somebody's got to do it.
Consider Renting a Bike
If your current bike isn't really made for park riding and you can afford a rental, it's worth considering. Bike park rental fleets usually have modern downhill or enduro bikes designed for exactly this kind of riding. Instead of beating up your lightweight trail or XC bike all day, you get something with more suspension and a setup intended for rough descents. Many parks also rent full-face helmets, pads, and other protective gear.
Another little tip if you're ever shopping for a bike: some parks sell their rental bikes after a season or two. Those bikes have obviously been ridden, so inspect them carefully, but sometimes you can find a pretty good deal.
Know Your Ticket Options
You don't necessarily have to buy the most expensive ticket. Depending on the park, you may find full-day tickets, half-day tickets, multi-day packages, and season passes. For your first trip, a half-day can actually make sense if you're not sure how long you're going to last. Some parks also offer lessons and bike demos. If you're brand new to this type of riding, a lesson can be a good way to learn the mountain and get comfortable with park riding.
The Bike Shop Can Save Your Day
Most established bike parks have a bike shop somewhere around the base area. I've had mechanical problems during park days, and having a shop right there can be the difference between losing a little riding time and losing the entire day. Park mechanics are used to dealing with bikes getting absolutely hammered, so if something breaks, don't immediately assume your day is over.
Bring Your Own Food and Drinks
Unless you enjoy paying resort prices, bring food. Seriously. Ten-dollar Red Bulls are real. I'll usually bring enough snacks and drinks to get me through the day rather than buying everything at the mountain. You'll already be spending money on the lift ticket, transportation, possibly lodging, and maybe a rental, so you might as well save some money where you can.
Don't underestimate how much you'll need to eat and drink either. A full day of descending takes more out of you than you might expect, especially if you're riding at altitude or in hot weather.
Pace Yourself
It's easy to underestimate how tiring bike park riding is because you're taking the lift instead of pedaling all the way back up. You get on the lift, ride down, get back on the lift, and do it again. Then several hours later you're exhausted. Descending all day takes a real toll. You're dealing with rough terrain, braking, impacts, sun, possibly altitude, and hours of constant concentration.
Eat, drink water, and actually sit down occasionally. Don't wait until you're completely exhausted to take your first real break. Late in the day, when you're tired and your reactions aren't as sharp, is exactly when mistakes start happening.
Forearm Pump Is Real
If you've never spent an entire day descending, your forearms may be one of the first things to give up. Hours of braking and holding onto the bike through rough terrain can absolutely cook your arms and hands. I've done multi-day park trips where by the end my forearms were so pumped I could barely hold onto the bars anymore.
Shake your hands and arms out on the lift and take breaks. If your grip is getting so tired that you can't properly control the bike anymore, that's a pretty good sign it's time to stop for a while.
Stay on the Marked Trails
Some parks have back trails and barely official or completely unsanctioned lines splitting off from the main trail system. As a beginner, stay on the marked, patrolled trails. Difficulty isn't the only issue. If you crash or have a mechanical on some obscure back trail, patrol may not regularly come through there and far fewer riders may pass you.
I've learned this one the hard way. There's already more than enough terrain to explore on the official trails when you're starting out.
Hang Onto Your Pass
This is a small one, but don't lose your lift pass. If you buy a season pass and forget or lose it, many parks can print another one, but you may have to pay a replacement fee. It's not a disaster, just annoying.
If You Can, Turn It Into a Camping Trip
This isn't necessary for your first park day, but it's one of my favorite things in mountain biking, so I have to mention it. Look for campgrounds around the bike park. At least once a year I try to camp somewhere that's riding distance from the lift. I've stayed at places where some of the back trails practically drop you off at the campground, and when I'm there, I squeeze about as much mountain biking into the trip as my body can handle.
I'll get up at the crack of dawn and pedal into the forest before the lifts are even running. Then I'm at the lift when it starts spinning and ride laps all day. When the lift closes, I'll sometimes ride more back trails until the sun starts going down. Then it's back to camp. Start a fire, cook dinner after a full day of riding, sit around with destroyed legs talking about the day's rides, go to sleep, wake up, and do the whole thing again.
There's something about camping and riding that just works. No drive home, no schedule, nothing between you and the trails except opening your tent. It's even better with friends. Everybody rides together all day, then sits around the fire at night comparing crashes and forearm pump while eating camp food that somehow tastes better than it has any right to.
A day trip to a bike park is great. A camping trip at a bike park is a whole different experience. If you get the chance to do it, even once, take it.
Your First Bike Park Day Doesn't Have to Be Intimidating
Bike parks are some of the most fun you can have on a mountain bike. You can get more descending in a single day than you'd normally get from weeks of regular riding, experience terrain you might not have near home, and repeat trails enough times to really work on your riding.
Your first visit might feel a little overwhelming. There's the lift, the crowds, unfamiliar trails, different gear, and a bunch of little rules you didn't know existed. Don't worry about trying to look like you know everything. Start easy, ride within your ability, pay attention to what's happening around you, take breaks when you're tired, and ask the park staff when you don't know something. Every rider flying past you was a first-timer once too.
By the end of the day, there's a pretty good chance you'll be wondering why you didn't try a bike park sooner. And fair warning: park days are addicting. Don't be surprised if you're checking season-pass prices on the way home.
New to mountain biking? This is just one part of what I cover in The Complete Guide to Mountain Biking for Beginners. The book walks through choosing your first bike and gear, basic riding skills, trail riding, bike parks, and a lot of the little things I wish someone had explained to me when I was starting out.